Locking Up Sensitive Information on a Mac
In the post just before this one called How to Hack a Mac, I mentioned File Vault Encryption was about the only way that you could keep your Mac from being compromised by a anyone who gained physical access to it. In that post I pointed out that there were some downsides to File Vault Encryption and it is a far better option for most people to Encrypt one or two folders on their computers rather than locking down their entire Mac with File Vault Encryption. So let’s talk about how to do that.
There’s lots of third party software available in the Mac Store and elsewhere online to help you encrypt i.e. password protect your sensitive files. You can buy Secret Folder Pro for as little as $1.99. Or you can buy an even better encryption app called Concealer for $19.95 or even a fancier one that’s called Espionage for $29.95. But why pay money to gunk up your precious Mac with more non-Apple apps when you can encrypt or password protect folders yourself using software that’s already on your Mac.
The Geek Way to Encrypt Folders on a Mac
First of all we’re not going to just password protect a folder like you might do by right-clicking on one in Windows. Steve Jobs used to roll his eyes at that sort of Mickey Mouse way of half-ass doing things. No we’re Mac guys, so we’re going to create a password protected encrypted disk image (.dmg file) of a folder on our Mac that even Edward Snowden couldn’t hack into.
Ready? Let’s do this!
Go to your Mac’s Application folder (Shift + Cmd +A) and once there open Utilities and then open the Disk Utility program. Once in Disk Utility, click the File menu in the top left corner of your screen and select New and then click on Disk Image from Folder. Next, navigate to and click to select the folder or folders you want to password-protect and click the Image button.
In the next box that appears, choose a format for your folder/disk image. If you want it to be editable, choose Read/Write. Next, select an encryption level of either 128-bit or 256-bit. 128-bit is slightly less secure but takes less time to encrypt. After you’ve made your choices, click the Save button.
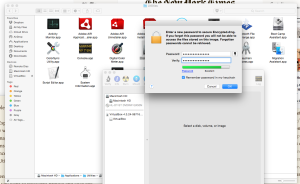
Now you will be asked to provide a password so enter one and verify it. After that it’s very important to uncheck the box next to “Remember password in my keychain” because otherwise you or an intruder will not be asked for a password when opening the newly created password protected .dmg file image because OS X will automatically supply the password and you don’t want that so uncheck that box! Now click O.K. and your Mac will create an encrypted disk image of the folder in the form a .dmg file right where you specified or if you didn’t choose a location for it it will be placed in the same location as the folder you chose to encrypt.
To access your files just double-click the .dmg file and enter your password. This will cause a .dmg icon to appear on your Desktop (default location) which you can double-click to access your newly encrypted folder. You can add more files, delete files, copy them, edit them or re-arrange them or whatever. But once you’re finished working with the folder and want it to be password protected again you have to unmount it from Finder. Here’s how to do that: close the folder in the normal way and then click to highlight the disk image icon on your Desktop and in the menu bar at the top left corner of your screen click File and then click “Eject XXX” when XXX is the name of the disk image of your Folder. Or you can just right-click on the Desktop icon to eject it. But by all means, eject it to get rid of it otherwise anyone can come along and click it open and access all the files you intended to make private.
You will probably want to delete the original folder now that you have its contents safely locked away in a password protected encrypted disk image.
If you found any of this information idiotic or confusing, yell at me in the comments.


Pingback: How to Hide Files and Folders on a Mac | Scoroncocolo's News and Reviews
WOW just what Ι was looking for. Came here by searching foг xxx