How to Change the Password on a Mac
Let’s say a friend or family member has forgotten his/her Mac’s password and wants you to break into his or her computer and re-set it. It turns out that hacking a Mac is a heck of a lot easier than hacking a PC. Back in January of last year I wrote about how easy it is to break into a Windows PC. But breaking into a Mac is even easier provided FileVault disk encryption hasn’t been turned on and in most cases it will not have been .
There are a number of ways to break into a Mac just as there are several ways to compromise a PC. In this post, I’m going to show you the easiest way to hack a Mac.
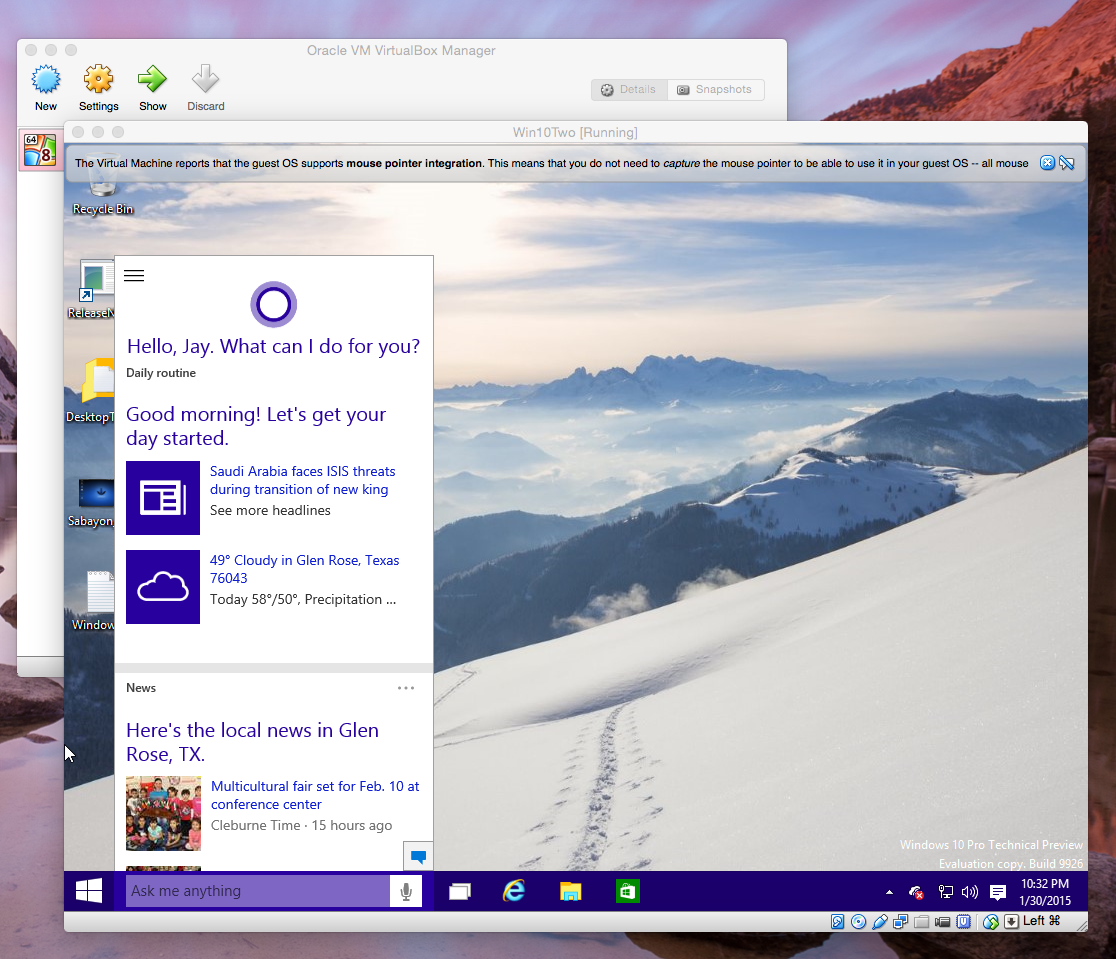
All you need to do to hack a Mac is to boot it into Recovery Mode (the Recovery Partition that’s on every Mac) and fire up Terminal. To access the Recovery Mode on a Mac, press the Cmd and the R key during the boot-up process. Once you’re in Recovery mode open Utilities and open Terminal and type resetpassword into the Terminal window and then hit the Enter key. It’s pretty much that simple. I’ve put the exact details at the very bottom of this post.

Click the above image to enlarge it.
Before OS X 10.7 Lion, you didn’t even have to open Terminal. You just had to boot into Recovery Mode and then go to Utilities and then select Password Reset from the menu.
So Wow, is it easy to hack a Mac or What! So how do you prevent someone from coming along and breaking into your Mac and mucking around in all your files?
To prevent someone from resetting your Mac’s password and gaining access to your files, all you need to do is to go to System Preferences > Security and Privacy and enable FileVault to be turned on. Once FileVault is enabled no one will be able to re-boot your Mac into Recovery Mode and make changes to your password. FileVault encrypts your entire computer making all of your files totally inaccessible to anyone who doesn’t know your password. But do you really want to enable FileVault encryption on your Mac?
The Pros and Cons of FileVault Encryption
Apple’s newest OS, Yosemite, enables FileVault by default. Before OS X 10.10 Yosemite, FileVault was turned off by default. And I think there was a good reason for this since there are pros and cons to FileVault and for me the cons out weigh the pros for average Mac users.
Here’s why you might not want to enable FileVault encryption. First of all, if there are a few things you’d like to keep private on your Mac, it makes more since to store those things in a single encrypted folder than encrypting your entire computer. Secondly, it will definitely slow down your Mac – newer Macs with lots of RAM and SSD drives barely enough to notice but older Macs appreciably. Most importantly you’ll need to remember your Mac user account password or recovery key (I’ll explain recovery key in the FileVault setup instructions below) or you’ll never be able to use your Mac again.
As I mentioned before, FileVault encryption will slow down your Mac especially if you’re doing something RAM intensive like working with PhotoShop or doing Movie editing. So if you’re going to use it you might want to set up two user accounts one encrypted with FileVault for all your sensitive files and the other without FileVault encryption for when you are doing everyday stuff like working, playing games or surfing the Web.
When I got this new iMac in November of last year, one of the first things I did was turn on FileVault. A few days later I turned it off and it’s been off ever since. I’ve got 16 Gigs of RAM and a Fusion Drive, but I could still “feel” the drag that FileVault encryption was causing. But if you want to turn it on here’s how:
1) Log on to the user you want to encrypt with FileVault
2) Go to System Preferences > Security and Privacy and click on FileVault tab

Click the above image to enlarge it.
3) Click the padlock icon and type in your Mac’s password
4) Click the Turn On FileVault button and you will be presented with this page:
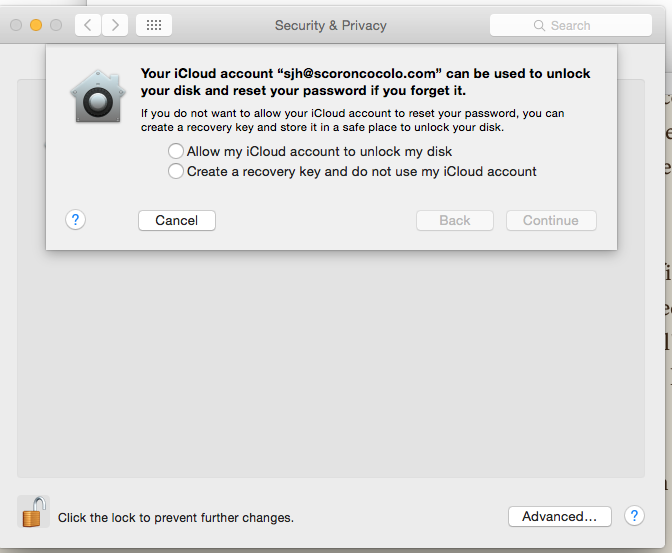
Click the above image to enlarge it.
Using the Recovery Partition to Change a Mac’s Password
There is a hidden partition on your Mac called the Recovery Partition and it’s been a part of OS X ever since OS X 7 Lion so this password re-set hack I’m about to detail will work on any Mac running Lion, Mountain Lion, Mavericks or Yosemite.
1) Restart the Mac. You can use the power button on the back of the Mac to do this.
2) The instant you hear the Startup chime press and hold the Command and R keys for 5 seconds and release. Soon you’ll see the Apple logo and a progress wheel (or bar in the case of Yosemite).
3) Once the Mac has booted into Recovery Mode you’ll see a page called OS X Utilities. I’ve put a picture of it at the top of this post.
4) Don’t try to click on anything on this page. Instead go to the Menu at the very top of your screen and Click Utilities > Terminal.
5) In the Terminal window type or copy and paste resetpassword and hit Return.
6) A new window will open that will look like this:
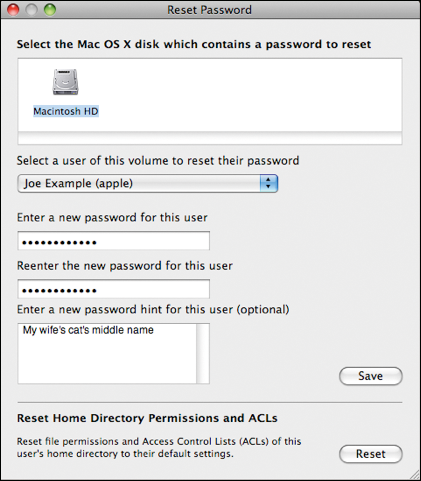
Click the above image to enlarge it.
7) Click on the icon of your drive
8) Select the desired user account. It will be pre-selected to you if you’re the only user.
9) Enter your new password twice. It has to be different from the old one, of course.
10) Click the Save button
11) Go back to the Menu at the top of the screen and click OS X Utilities > Quit OS X Utilities and you will be prompted to restart the Mac
12) Log on with your new Administrator password you created in step 9 and if necessary go to System Preferences > Users and Groups and start cleaning house.